在 Nativescript 中使用 Shopify 管理 API 和 Vue
Shopify 是一个电子商务平台,允许您轻松快速地创建、配置和运行自己的在线商店。根据 Shopify 的说法,全球有超过 100 万商家使用 Shopify。
Shopify 提供 API 端点,用于与有关单个 Shopify 商店的数据进行交互,例如产品、订单、客户等数据。
让我们看看如何使用 Shopify 管理 API 在 Nativescript Vue 应用程序中实现针对产品的 CRUD 功能。


关注 Oscar Lira!
Shopify 私人应用程序
私人应用程序 专为单个 Shopify 商店构建。您可以使用它们通过 Shopify 的 API 直接访问数据,或将在线商店扩展到其他平台;在本例中是移动应用程序。
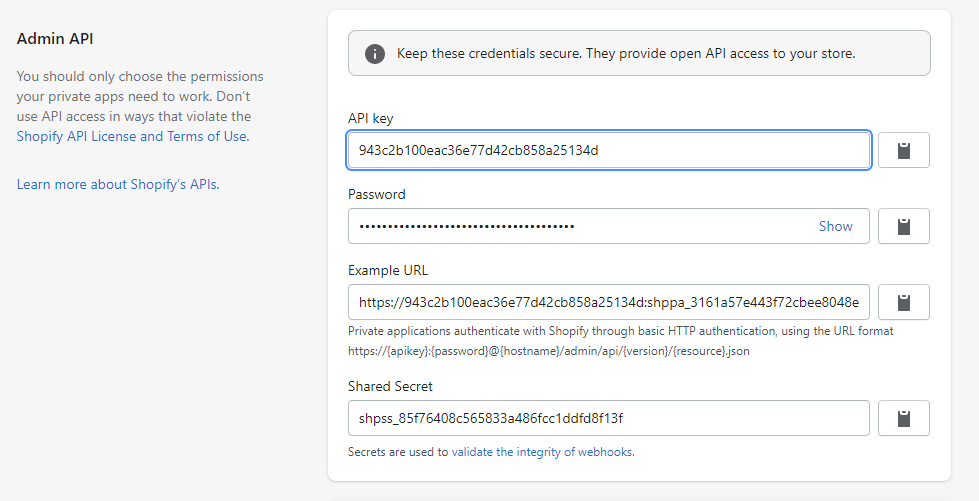
因此,我们需要转到 Shopify 商店并创建一个私人应用程序,以生成将在我们的 Nativescript 应用程序中使用的 Api 密钥,并为产品提供读写权限。(如果您不知道如何创建私人应用程序,可以 访问此链接)
让我们创建我们的应用程序
一旦我们有了 Api 密钥以及 Shopify 中产品的权限,我们就可以使用 Vue 创建 Nativescript 项目,在本例中我使用的是 Typescript,但如果您想使用纯 JavaScript,没问题!!此应用程序的脚手架将是相同的
vue init nativescript-vue/vue-cli-template shopify-nativescript
npm install
请确保您的 Nativescript 已更新到最新版本
现在进入应用程序文件夹并添加以下包
"@nstudio/nativescript-cardview": "^2.0.1"
"@nstudio/nativescript-floatingactionbutton": "^3.0.4"
"nativescript-toast": "^2.0.0"
"vue-class-component": "^7.2.6",
"vue-property-decorator": "^9.1.2"
定义 Shopify 服务类
首先,我们需要 Shopify 商店的 URL 和由 Api 密钥和密码组成的 base64 字符串。
按照以下两个步骤生成它
将 API 密钥和密码用单个冒号 (
:) 连接起来将生成的字符串编码为 base64 表示形式
您可以在 此处 获取更多信息
然后创建一个 ShopifyService 类,其中将包含对 Shopify 管理 API 的所有请求
import { Http } from "@nativescript/core";

export default class ShopifyService {
    static STOREURL:string = "https://nativescript-store-1.myshopify.com/"
    static BASIC_AUTHENTICATION:string = "YOUR_BASE64"
}
在应用程序中列出 Shopify 产品
在 ShopifyService 类中,添加 viewProduct 函数以检索商店的产品...
🧐 请注意,我们正在请求端点
admin/api/2021-01/products.json并在请求的标头中添加基本身份验证 (base64)。
以下是 Shopify 端点的完整列表 https://shopify.dev/docs/admin-api/rest/reference
static ViewProducts() {
    return Http.request({
        url: this.STOREURL + 'admin/api/2021-01/products.json',
        method: 'GET',
        headers: {
            'Authorization': 'Basic ' + this.BASIC_AUTHENTICATION,
            "Content-Type": "application/json"
        },
    });
}
我们的主要 App.vue 视图将包含一个 ListView 和一个 Floating Action Button 来添加产品
<Page>
    <ActionBar title="Shopify API in NativeScript-Vue!" />
    <GridLayout columns="*" rows="*">
      <ActivityIndicator row="0" :busy="loading"
       :visibility="!loading ? 'collapse' : 'visible'" verticalAlignment="top"/>
      <ListView for="item in products" row="0">
        <v-template>
          <CardProduct :p_product="item" />
        </v-template>
      </ListView>
      <Fab @tap="add" row="0" rippleColor="#f1f1f1" class="fab-button fa">
          {{"fa-plus" | fonticon}}
      </Fab>
    </GridLayout>
  </Page>
它看起来像这样 😎😎😎
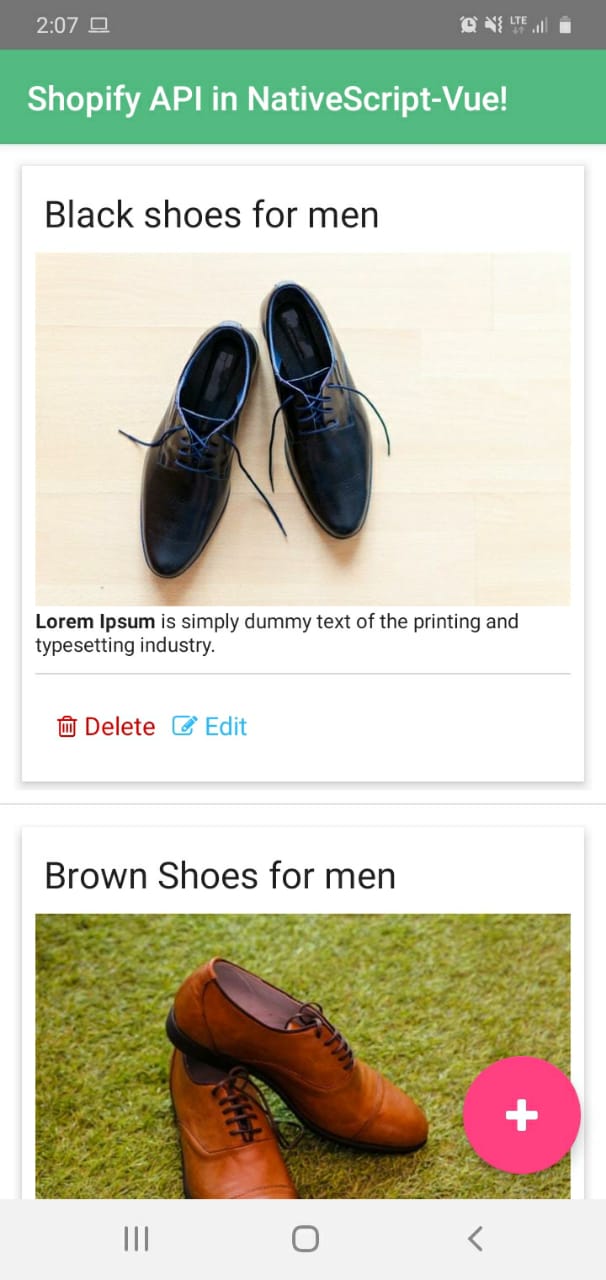
App.vue 的代码包含 mounted 钩子,它将调度 load 操作以通过 Vuex 调用 Shopify 产品
我使用 Vuex 模块,并且为操作、getter、mutation-types、mutation 和模块创建了单独的文件
😬 不用担心!在文章末尾,我将在 Git Hub 中分享完整的代码
请记住,当视图加载时,mounted 函数会执行
<script lang="ts">
...
export default class App extends Vue {
      mounted() {
        let vm = this;
        vm.loading = true;
        this.$store.dispatch("shopifyProducts/load").then(function () {
          vm.loading = false;
        });
  }
...
}
这是 Vuex 中的 load 操作,它在此调用之前在 ShopifyService 类中创建的 viewProducts 函数,并通过 mutation 将每个产品添加到数组中
export const load = ({ commit }) => {
    return new Promise((resolve, reject) => {
        ShopifyService.ViewProducts().then(function (data) {
            let content = JSON.parse(data.content+"");
            content.products.forEach(p => {
                commit(types.ADD, {
                    id: p.id,
                    title: p.title,
                    body_html: p.body_html == null ? '':p.body_html
                })
            });
            resolve(true)
        });
    });
}
🧐 请注意,我们有 CardProduct.vue 组件在主要 App.vue 中的 ListView 元素内
<card-view margin="5" elevation="10" radius="1">
    <StackLayout>
      <label :text="p_product.title" class="h2"></label>
      <Image :src="imgSrc" stretch="aspectFit" />
      <HtmlView :html="p_product.body_html" />
      <StackLayout class="m-10 hr"></StackLayout>
      <StackLayout orientation="horizontal">
        <Label @tap="delete_" horizontalAlignment="right" class="text-danger h3 fa"
  		style="margin-left: 0">{{ "fa-trash-o" | fonticon }} Delete</Label>
        <Label @tap="edit" horizontalAlignment="right" class="text-primary h3 fa">
            {{ "fa-pencil-square-o" | fonticon }} Edit</Label>
      </StackLayout>
    </StackLayout>
</card-view>
此组件将在 ListView 中显示每个产品,并接收产品作为 prop 以显示产品的标题和描述,但图像呢?
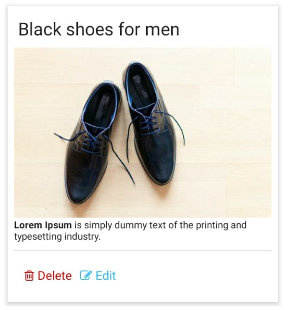
... 其对应的代码将在 mounted 钩子内通过 Vuex 调度 loadImageByProduct 操作以获取产品内部的图像
...
@Prop() private p_product: {
    id: "";
    title: "";
    body_html: "";
  };
...
mounted() {
    let vm = this;
    store.dispatch("shopifyProducts/loadImageByProduct", this.p_product)
    .then(function (img) {
        vm.imgSrc = img;
    })
}
...
在 ShopifyService 类中,我们有获取产品图像的函数,其 URL 为 admin/api/2021-01/products/${product_id}/images.json。此函数接收 product_id 参数以识别 Shopify 中的产品
static loadImageByProduct(product_id) {
        return Http.request({
            url: this.STOREURL + `admin/api/2021-01/products/${product_id}/images.json`,
            method: 'GET',
            headers: {
                'Authorization': 'Basic ' + this.BASIC_AUTHENTICATION,
                "Content-Type": "application/json"
            },
        });
    }
添加新产品
现在添加创建产品的函数,这里我们使用 admin/api/2021-01/products.json 端点,并接收仅包含产品名称的产品对象
static addProduct(data) {
        let product = {
            product:data
        }
        return Http.request({
            url: this.STOREURL + `admin/api/2021-01/products.json`,
            method: 'POST',
            headers: {
                'Authorization': 'Basic ' + this.BASIC_AUTHENTICATION,
                "Content-Type": "application/json"
            },
            content: JSON.stringify(product)
        });
    }
在 Vuex 中,添加相应的 addProductTitle 操作,该操作调用 ShopifyService 类的 addProduct 函数
在本例中,为了简单起见,我仅使用产品名称创建产品
此操作创建产品,进而通过 mutation 将每个产品添加到数组中
export const addProductTitle = ({ commit }, data) => {
    return new Promise((resolve, reject) => {
        let product = data;
        ShopifyService.addProduct(product).then(function (data) {
            let content = JSON.parse(data.content+"");
            if(data.statusCode == 201){
                commit(types.ADD, {
                    id:content.product.id,
                    title:content.product.title,
                    body_html: content.body_html == null ? '':content.body_html
                })
                resolve(true)
            }
            else
                reject('error')
        });
    });
}
在主要 App.vue 中,我们添加了在点击浮动操作按钮时创建产品的函数
...
add(){
    let vm = this;
    prompt("Add product").then((result) => {
      if (result.result) {
        this.$store.dispatch("shopifyProducts/addProductTittle", {
            title: result.text,
          }).then(function (data) {
            var toast = Toast.makeText("Added successfully");
            toast.show();
          }).catch(function (data) {
            var toast = Toast.makeText("Error");
            toast.show();
          });
      }
    });
  }
...
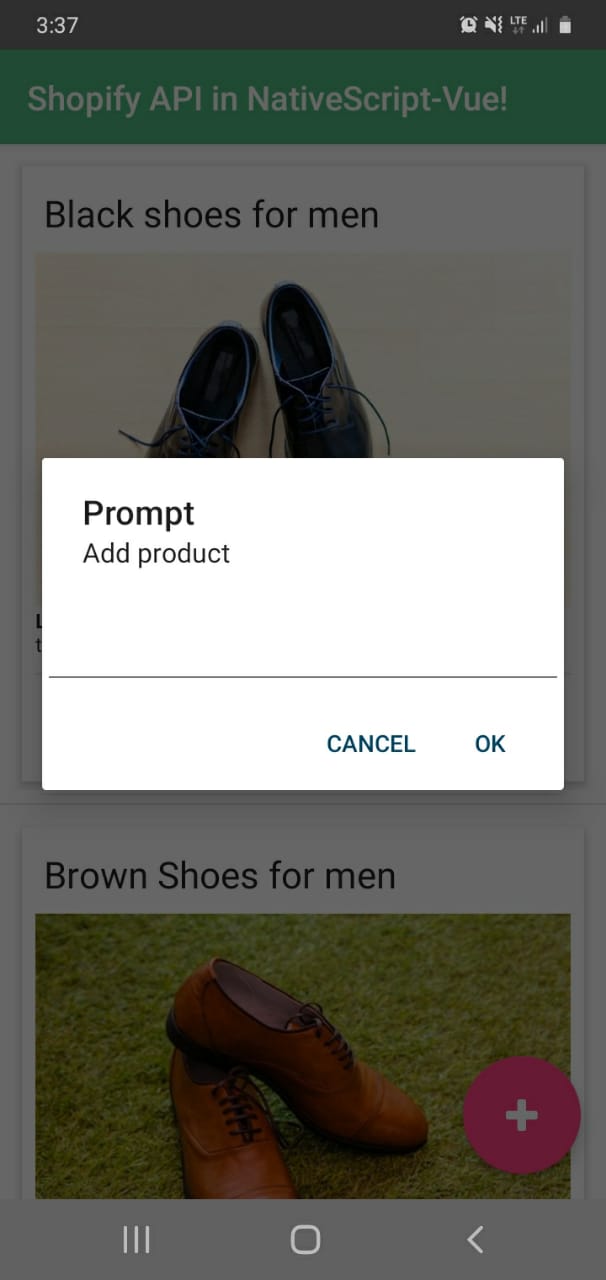
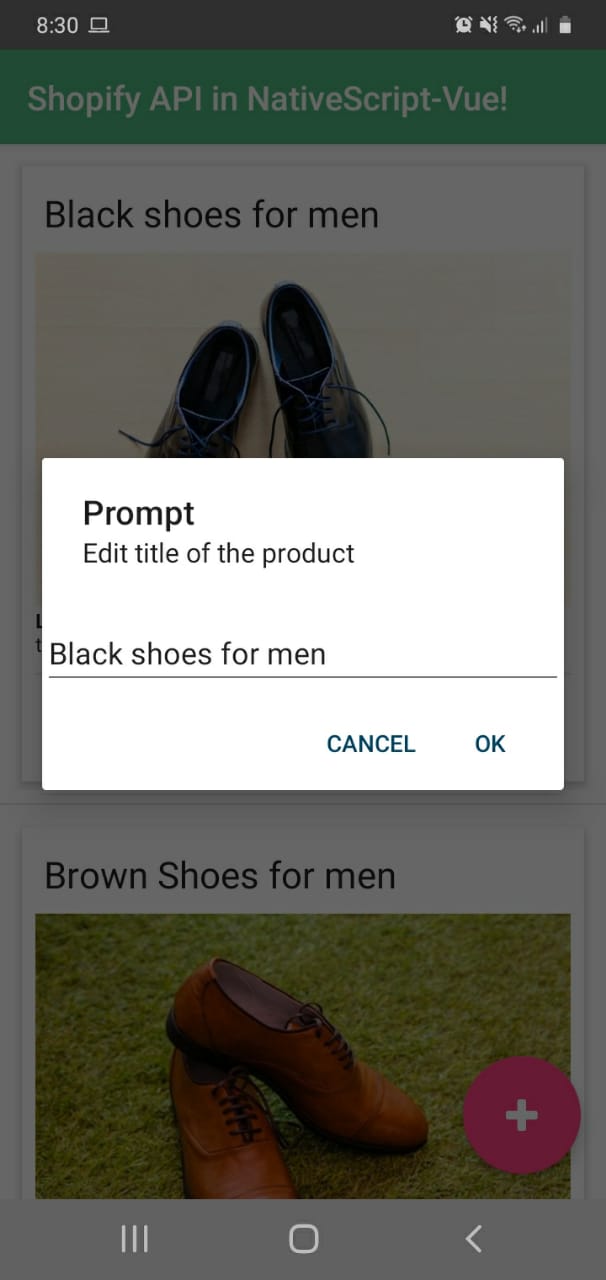
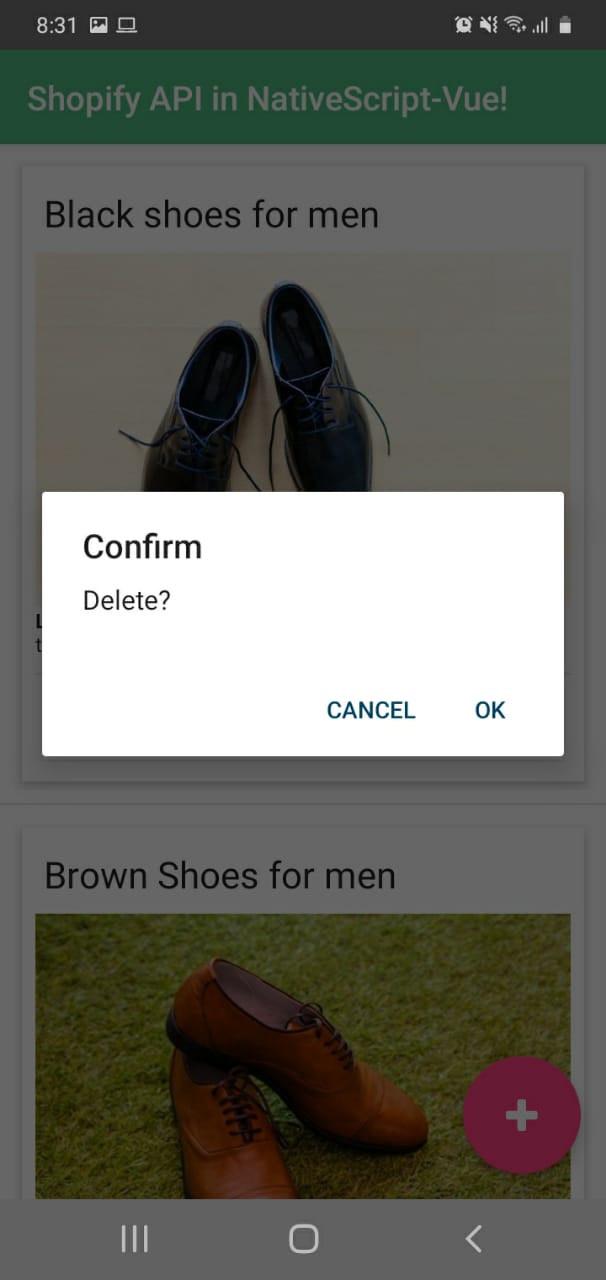
编辑和删除产品的代码
在 CardProduct.vue 组件中,我们添加了最后两个函数,它们是编辑和删除函数
...
edit() {
    let vm = this;
    prompt("Edit title of the product", this.p_product.title).then((result) => {
      if (result.result) {
        store.dispatch("shopifyProducts/updateTitleProduct", {
            id: vm.p_product.id,
            title: result.text,
          })
          .then(function (data) {
            var toast = Toast.makeText("Updated successfully");
            toast.show();
          }).catch(function (data) {
            var toast = Toast.makeText("Error");
            toast.show();
          });
      }
    });
  }

delete_() {
    let vm = this;
    confirm("Delete?").then((result) => {
      if (result) {
        store.dispatch("shopifyProducts/deleteProduct", {
            id: vm.p_product.id,
          }).then(function (data) {
            var toast = Toast.makeText("Deleted successfully");
            toast.show();
          }).catch(function (data) {
            var toast = Toast.makeText("Error");
            toast.show();
          });
      }
    });
  }
...
... 对于 Vuex,我们有其相应的操作,它们调用 ShopifyService 类的 addProduct 和 deleteProduct 函数
export const addProductTittle = ({ commit }, data) => {
    return new Promise((resolve, reject) => {
        let product = data;
        ShopifyService.addProduct(product).then(function (data) {
            let content = JSON.parse(data.content+"");
            if(data.statusCode == 201){
                commit(types.ADD, {
                    id:content.product.id,
                    title:content.product.title,
                    body_html: content.body_html == null ? '':content.body_html
                })
                resolve(true)
            }
            else
                reject('error')
        });
    });
}

export const deleteProduct = ({ commit }, data) => {
    return new Promise((resolve, reject) => {
        let product = data;
        ShopifyService.deleteProduct(product.id).then(function (data) {
            if(data.statusCode == 200){
                commit(types.DELETE, product)
                resolve(true)
            }
            else
                reject('error')
        });
    });
}
以下是 ShopifyService 类中的这些函数
export default class ShopifyService {
...
static updateTitleProduct(product_id, data) {
        let product = {
            product:data
        }
        return Http.request({
            url: this.STOREURL + `admin/api/2021-01/products/${product_id}.json`,
            method: 'PUT',
            headers: {
                'Authorization': 'Basic ' + this.BASIC_AUTHENTICATION,
                "Content-Type": "application/json"
            },
            content: JSON.stringify(product)
        });
    }

    static deleteProduct(product_id) {
        return Http.request({
            url: this.STOREURL + `admin/api/2021-01/products/${product_id}.json`,
            method: 'DELETE',
            headers: {
                'Authorization': 'Basic ' + this.BASIC_AUTHENTICATION,
                "Content-Type": "application/json"
            },
        });
    }
...
总结
Shopify 是一个完整的电子商务平台,但它提供 API 来创建新的功能。您可以通过利用 Shopify API 来解决许多电子商务需求。例如,想象一下开发围绕更新产品、库存、客户甚至接收订单通知的自定义行为... 但所有这些都在移动应用程序中。
这只是一个关于 Shopify 和 Nativescript 可以做些什么的简单示例! 💪😄
您可以在 此处查看代码